Once I had solved this little problem it was time to power up the printer for the first time. I connected everything except for the hot-end heater cartridge and the hot-end temp sensor.
But before I connected the power cables I checked the correct assignment of Vcc(+) and Ground(-) and the Voltage of 24 Volts with a multimeter.
When I turned the PS on, the screen lightened up and the green LED on the Einsy board as well. But no text on the screen. But the reset button seemed to work as the print fan started up when I pushed it.
I turned off the PS again and disconnected most of the cables, to ensure that not a problem with the cabling was preventing the printer to boot up.
then I double checked the 2 cables from the LCD, everything seemed to be right.
So I gave it a 2nd try, but still no text on the screen.

Then I thought that the LCD display might be broken. I did have another one lying around here(for the next project) and connected it. Still no change.
As next I connected one of the chinese LCD displays to my original Prusa MK3 and tested this.
Nope, no text.
I started to wonder if there is anything different on the LCD displays that Prusa is using, from the ones that I got from the Chinese seller on Aliexpress.
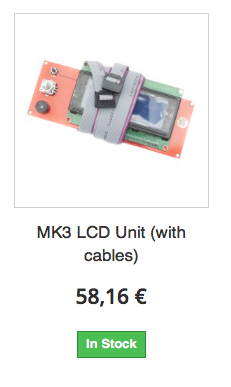
Just for comparison. On Aliexpress you pay less than 8 € including free shipping for the 2004 LCD Control board including the adapter for the Ramps 1.4 boards.

Prusa charges you over 58€ for the same board with no adapter(which is not required for the Einsy board) plus shipping! There must be a reason for it, right? NO!
But don't panic, I am an electronic engineer!
The solution is very simple. On the backside of the display there is a little potentiometer to adjust the contrast of the display. No idea why, but on all of mine the contrast was turned down until there was no text visible on the display.

Once I did this my Prusa wanted to take me thru the configuration wizard. But I declined as I need to make more changes to the printer.

But I could test that the stepper motors for the 3 axis where moving correctly. I have seen some people complaining that they needed to change wires on the steppers. For me everything was working out of the box.
Then I checked the filament sensor, which was recognized. This one is tricky, be careful when you connect it to the board as the connector does not fit to the one on the eons board. It is the same problem as with the original Prusa.
Then I tested if the P.I.N.D.A probe was working. Compared to the original one you can barely see the LED from the sensor.

You can test with any metal, like a screwdriver if the sensor works. If you hold it under the sensor and it is detected the light goes off.

I need to finish the water cooling before I start testing the hot-end. But I got the last missing coupler for the tube today. So you can expect to see another update soon.
Once everything is tested with the original firmware I am going to show you which changes you have to make to get the Titan Aqua klon to work properly and how to compile the firmware.


No comments:
Post a Comment